Tufts Covid Center 🤖
Tufts Covid Center 🤖
I co-led the design and fabrication of a machine coupled with an ML solution designed to determine the testability of COVID-19 samples before sending them to a lab. With this machine in place, the rate of untestable samples sent to the lab fell from ~4% to ~1.25%.
In January 2021, three other students and I were tasked with solving a problem with the newly implemented Tufts Covid Center. Of the ~1800 students being tested each day, around 4% were told their nasal swabs were unable to be tested at the lab. Unfortunately, the lab could not explain this issue. Test took about 24 hours to be returned, so an invalid test meant that 24 hours after a student took their initial test, they had to go back to the testing center and retest. Then, after another 24 hours, they would receive their result, leaving them with a minimum of 48 hours where their COVID status was unknown.
Obviously this was an inconvenience to the students who had to retest, but it also meant that Tufts' COVID plan - updating the COVID status of each student twice a week at meaningful intervals - was failing. Students were not being kept as safe as they could have been.
We were approached by the head of Tufts' IT at the time, who proposed using an ML solution to differentiate between swabs that would return valid results at the lab and swabs that would be declared invalid. At that point, Tufts was testing each undergrad bi-weekly, so we were receiving close to 13,000 new samples a week - lots of data to train our model.
The plan was to build a machine to take an image of each swab upload it to the cloud, label each image with the unique serial number of the barcode on the test tube the swab was in, and when the lab returned the results, we could match up the serial number returned from the lab with the serial number from each tube. That way we could sort each image into valid or invalid buckets. From there, a model could be trained on these images to differentiate between valid and invalid swabs.
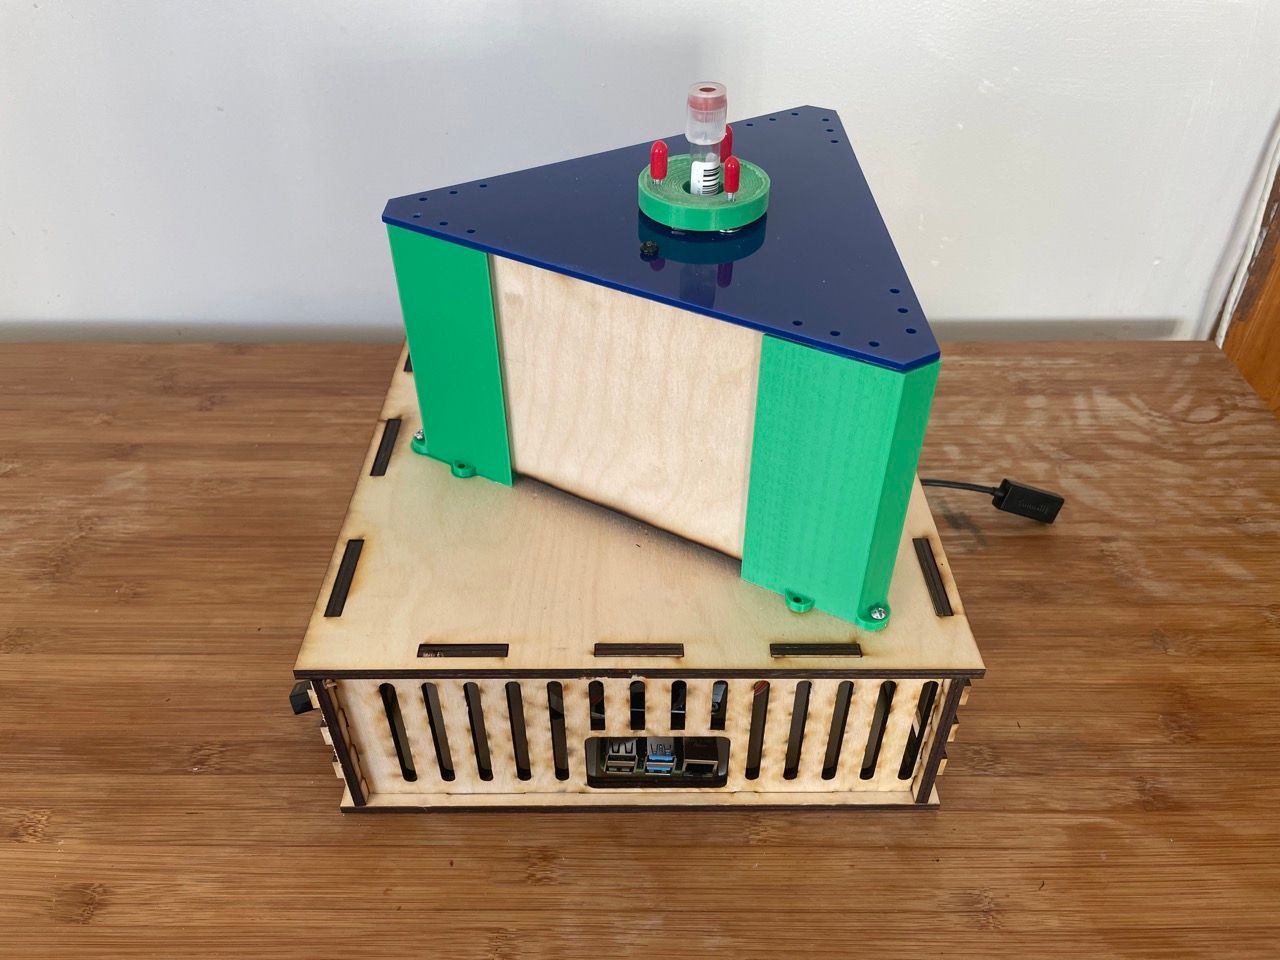
Validation machine
Before we could start building a model to train, we had to build a machine that could accomplish all of this, and we had to build it fast.
Learning on the Job
The first obstacle to building the machine was collecting the knowledge we needed to design, fabricate, implement neural nets, etc. Together we had a good foundation, but I still had a lot to learn. Below are the skills I acquired while working on this project.
- Solidworks: All the modeling for this project was done in Solidworks. Skills learned included sketching, gear making, generating parts lists / assembly drawings, and general modeling.
- Fabrication: This project was built with 3D printed and laser cut parts. I learned to dial in printing params, understand pros and cons of different filaments, set up laser cutter and printers, and plan laser cuts so parts would interlock and could be glued into place.
- Tensorflow: We implemented a convolutional neural network in Tensorflow to classify samples as valid or invalid. Skilled learned included understanding of convolutions and pooling, image normalization, model training, model evaluation methods.
- PHI / PII: Much of the data in the images we were collecting from students was protected by HIPPA. This meant we had to have a clear understanding of PHI (Protected Health Information) and PII (Personally Identifiable Information) so we knew what data we could collect, and what data we had to remove before saving the image to disk.
- Raspberry Pi: This project used two Raspberry Pis to coordinate the six internal cameras, process the images, run the images through the model, upload them to the cloud, and label all swabs with lab results (valid or invalid) once they were returned. Skills learned included writing scripts for each of these different applications - how to interface with cameras, how to sequence the shutters with the LED strips, how to upload images to and download images from a server, setting up Pi OS, and writing boot scripts.
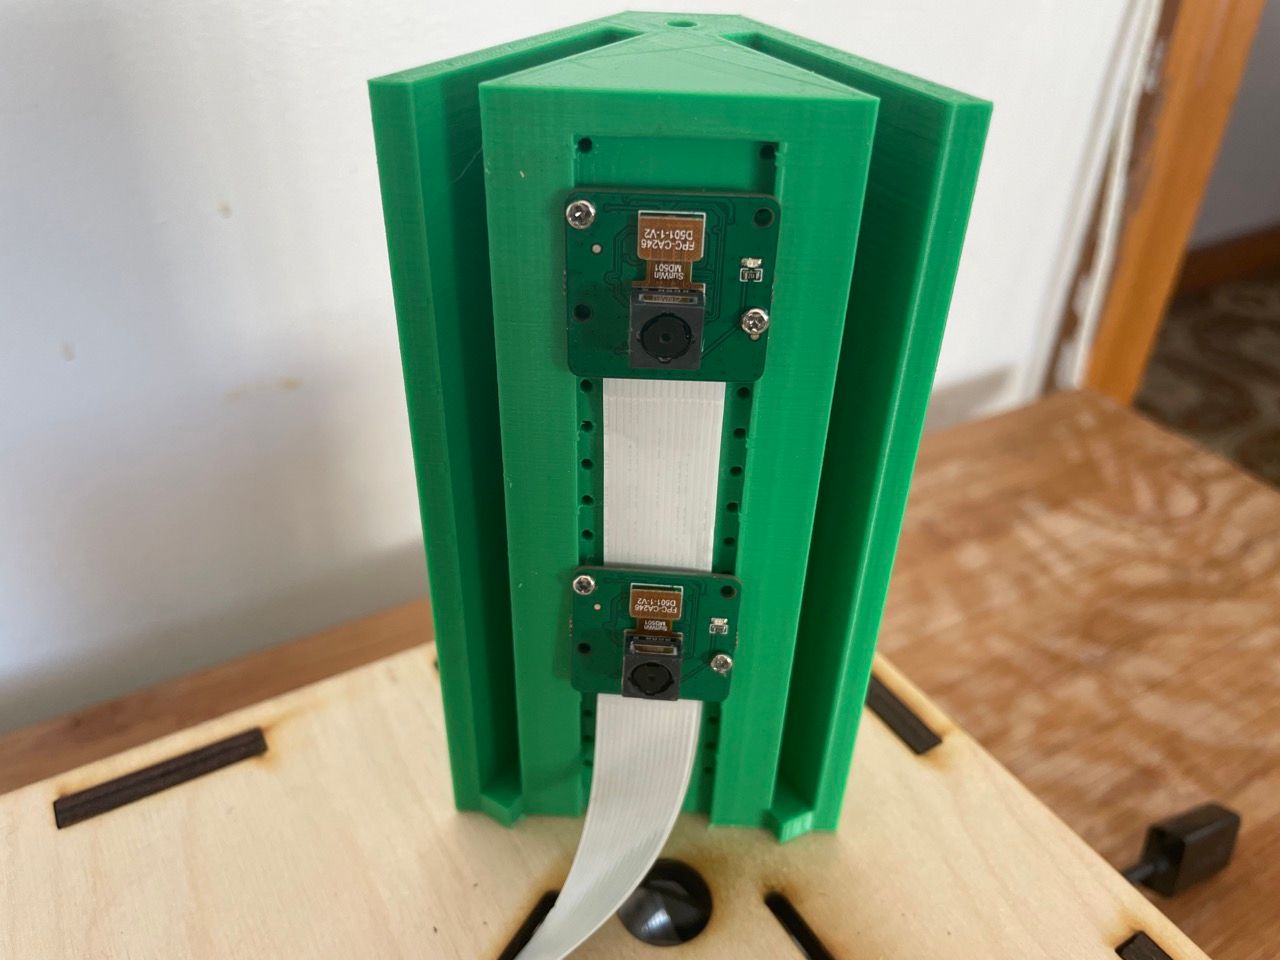
One of three sets of interior cameras
Conclusion
Despite all we had to learn, the machine was a success. Once we had it up and running in the testing center, the EMTs needed no assistance operating it, and with it we were able to drop the invalid testing rate from ~4% to around ~1.25%, an almost 75% reduction in invalid tests.
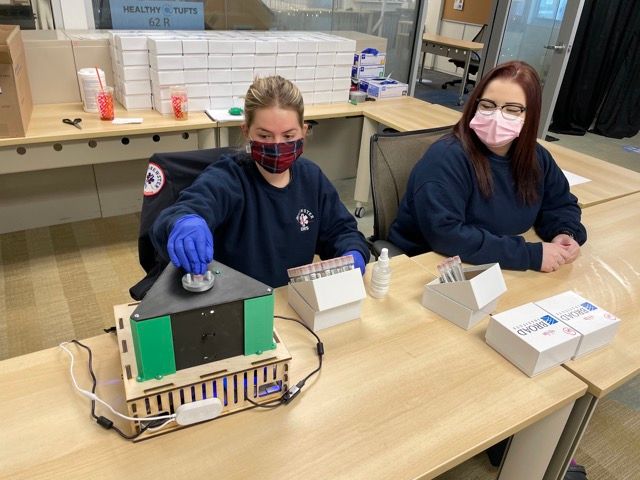
Two EMTs using the machine
Design Problems
Design Problem:
Ease of Use
Solution:
The machine was used by a cast of EMTs that rotated daily, so it had to be easy to learn and easy to use. To test a sample, a tube was inserted and gently pressed down, engaging the springs and firing the cameras. This simple process was easy for the EMTs to both teach and learn from each other.
Because of the high throughput of the testing center, the machine was designed to be used one-handed, so the EMTs could accept additional tubes while operating the machine. An LED + beeper combo meant they could interact with students while running tests because they didn't need to look at the machine to know if a test passed or failed.
Design Problem:
Photo Quality
Solution:
Backgrounds and lighting with large variance were solved by placing the swab, cameras, and lighting into an opaque box. Glare off the tubes from the LEDs in the box was reduced with polarized filters over the cameras, and light diffusers around the LEDs.
position:
Hardware Lead / Software Developer
location:
MA
start date:
Jan. 6th, 2021
end date:
Aug. 10th, 2021
skills:
Solidworks,
Fusion360,
Laser Cutting,
3D Printing,
Arduino,
Raspberry Pi,
TensorFlow,
Python,
Fabrication,
UX Design,
Bash Scripting